Sending Requests and Reading Responses
This chapter is where testing becomes tactile: crafting requests with each important HTTP method, then dissecting everything the server sends back.
Send a GET Request
Step 1 — Click a new tab to add a new request.
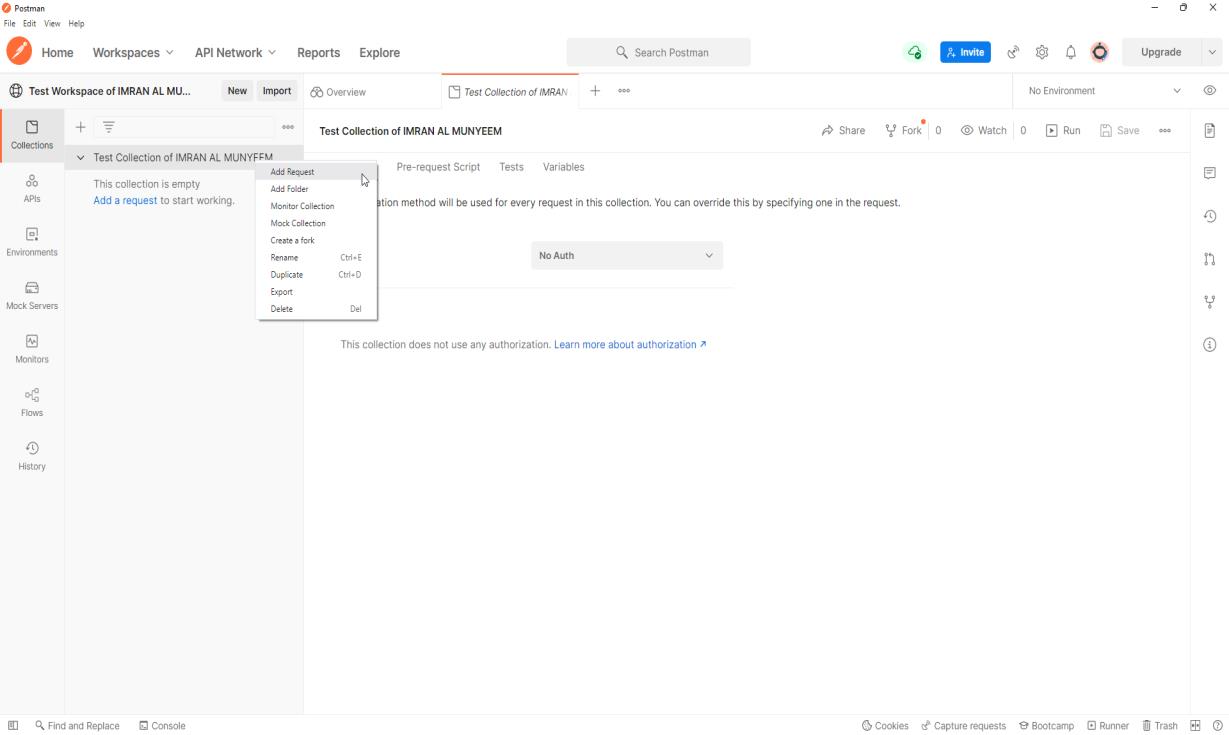
Step 2 — Create a GET request for a REST API endpoint:
- Set your HTTP request method to GET.
- Input the link in the request URL field — for example
https://jsonplaceholder.typicode.com/users. - Click on Send to execute.
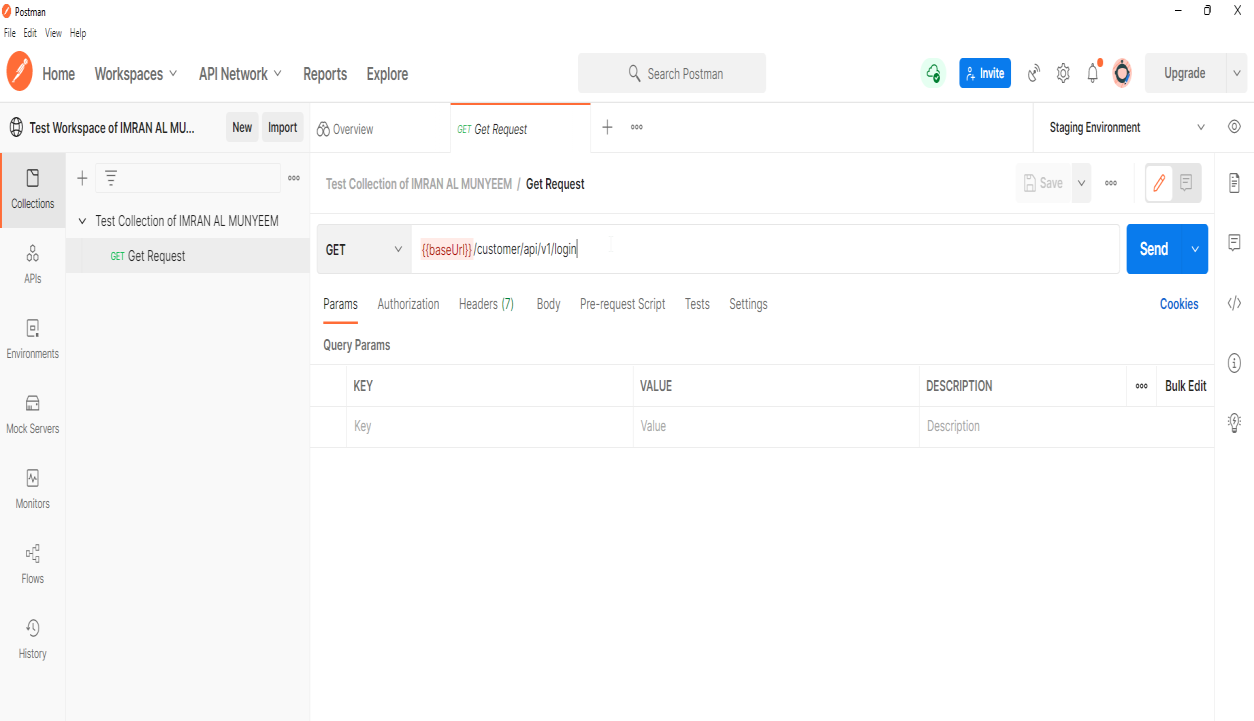
The response arrives in the lower pane: a JSON array of users, plus a status of 200 OK. Congratulations — you have just performed your first API test, informally. The rest of the book makes it formal, repeatable, and automatic.
Send a POST Request
POST requests are used for data manipulation — adding data to the endpoint. Let's add a user to the application. To do this we send data in the body of the request, and the API returns data in response, confirming the user has been created.
Steps:
- Set your HTTP request method to POST.
- Input the link in the request URL field.
- Click on the Body tab, select the raw radio button, then select JSON. Paste a single user object — copying one result from the previous GET request is a quick way to get the structure right.
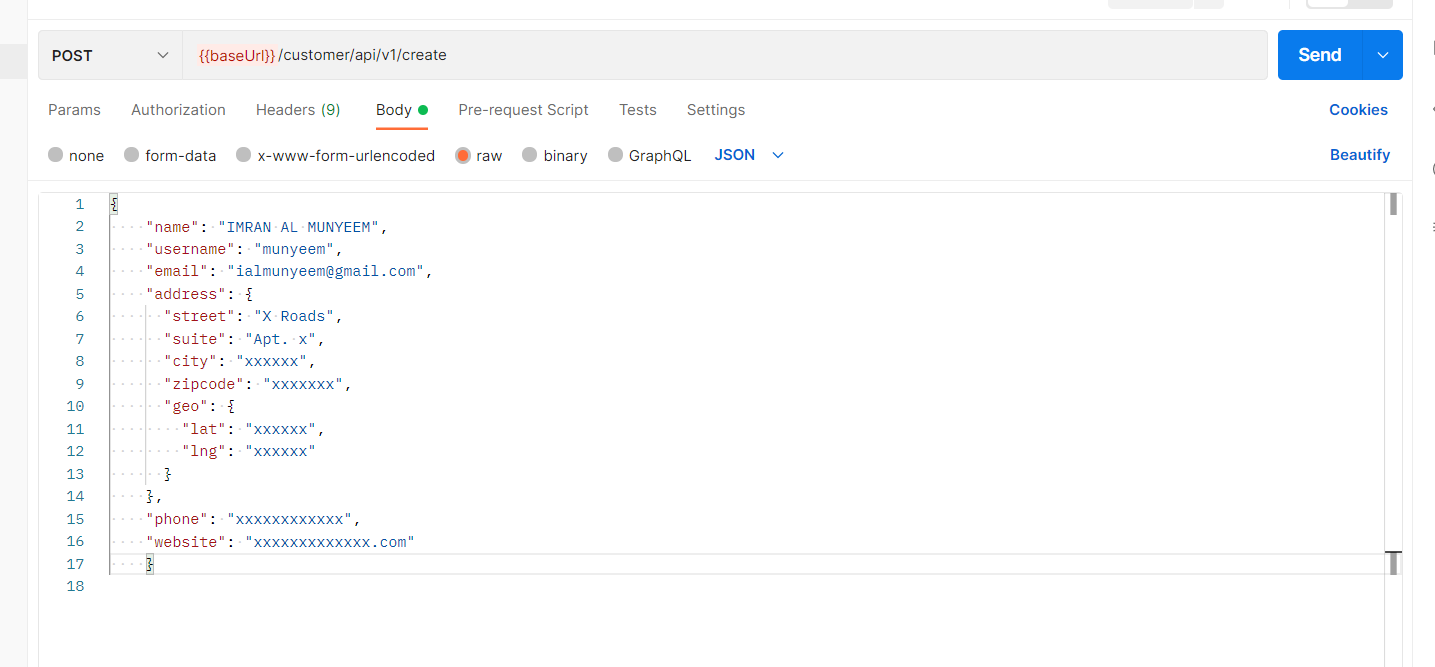
Send it, and note two things a tester always notes: the status code is 201 Created (not a generic 200 — creation has its own code), and the response body echoes the created resource, typically with a server-assigned id. That returned id is the thread we will pull in Chapter 7 to chain requests together.
The Rest of the Method Family
The same pattern covers the remaining methods, and a complete functional suite exercises all of them:
- PUT replaces a resource entirely — send the full object to
/users/1and expect 200 with the replaced resource. - PATCH modifies part of a resource — send only the changed fields.
- DELETE removes it — expect 200 or 204, and then a follow-up GET should return 404. (That follow-up is the real test; deletion that only claims to work is a classic bug.)
Pitfall: JSONPlaceholder, like many practice APIs, simulates writes — your POST returns 201 but nothing is truly stored. Perfect for learning the mechanics; just don't be surprised when a GET doesn't show your new user.
Analyse Responses
After the server responds, the response pane holds far more than the body, and each element is something a test can assert on.
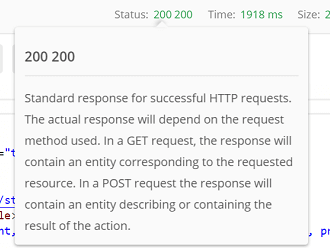
Status code. You will see 200 OK when a GET succeeds. Hover over the status for an explanation of what the code means.
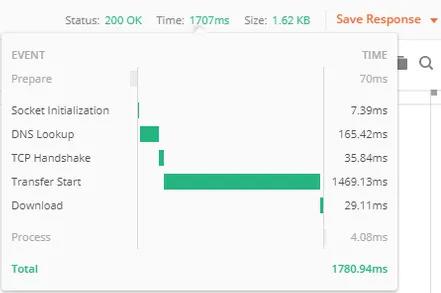
Response time. Hover over the time to see individual components — DNS lookup, TCP handshake, transfer start, download. When an endpoint is slow, this breakdown tells you where the time went, which is the difference between "it's slow" and a useful bug report.
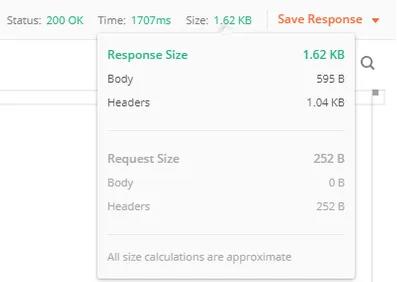
Response size. Similarly decomposed into body and headers. A payload that balloons from 5 KB to 5 MB after a release is a regression even if every field is technically correct.
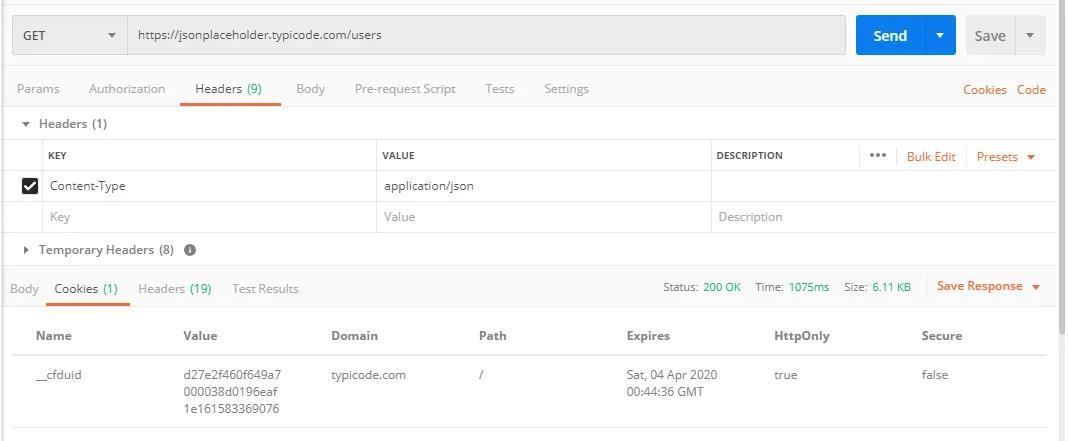
Cookies. Session-related information returned by the server appears in the Cookies tab.
Response headers. Metadata about the processed request.
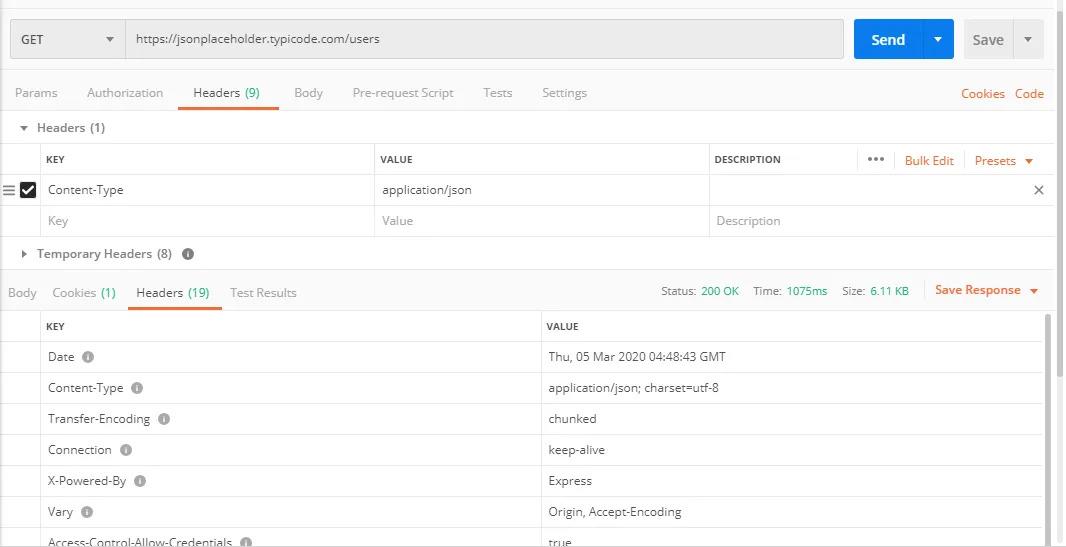
The headers a tester reads first:
- Content-Type — the format of the response, such as
application/json. If your API claims JSON but returns HTML (typically an error page), tests that parse the body will fail confusingly; assert the content type early. - Date — the server's timestamp for the response.
- Server — which server software responded. (Security teams often prefer this header suppressed; noticing it is a small security finding.)
- Cache-Control / Expires — whether intermediaries may cache the response; wrong caching on personalised data is a serious bug.
- Set-Cookie and its expiry — what session state the server is establishing.
Authenticating Your Requests
Real APIs are protected, so your requests must prove who they are. Postman gives you two routes.
The modern way — the Authorization tab. Every request (and the collection itself) has an Authorization tab supporting the schemes you will meet in practice: Bearer Token, API Key, Basic Auth, OAuth 2.0 (with Postman driving the full token flow, including refresh), JWT, AWS Signature, and more. Pick the type, supply the credentials, and Postman constructs the correct header on every send.
Best practice: configure authorisation once at the collection level and let every request inherit it; store the token itself in an environment variable of type secret (Chapter 6), so switching environments switches credentials too.
The manual way — headers. You can also supply credentials directly, which is exactly what the Authorization tab generates under the hood:
- Click on Headers.
- Enter
Authorizationas the key. - Put the credential in the Value field — for example
Bearer eyJhbGci...orToken 96c3fe....
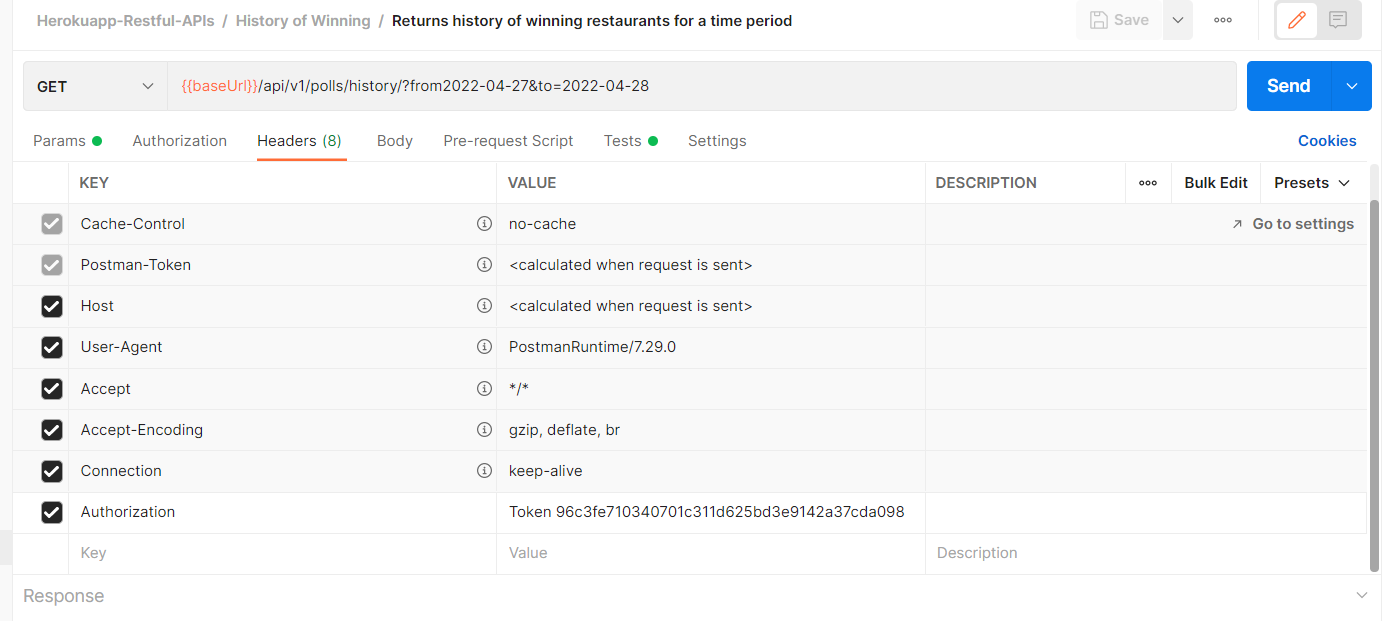
Knowing the manual form matters: it is what you will reproduce when debugging with cURL, reading raw HTTP traffic, or writing client code.
Testing angle: authentication is not just plumbing to get through — it is a test surface. A professional suite always includes the negative cases: no token (expect 401), an expired token (401), a valid token for the wrong user or role (403). Chapter 8 builds these into your strategy.
Key Takeaways
You can now speak full HTTP through Postman: every method, every part of the response, authenticated or not. So far, though, you are the assertion engine — you look at the response and judge it. The next part of the book teaches Postman to judge for you.