Collections and Requests
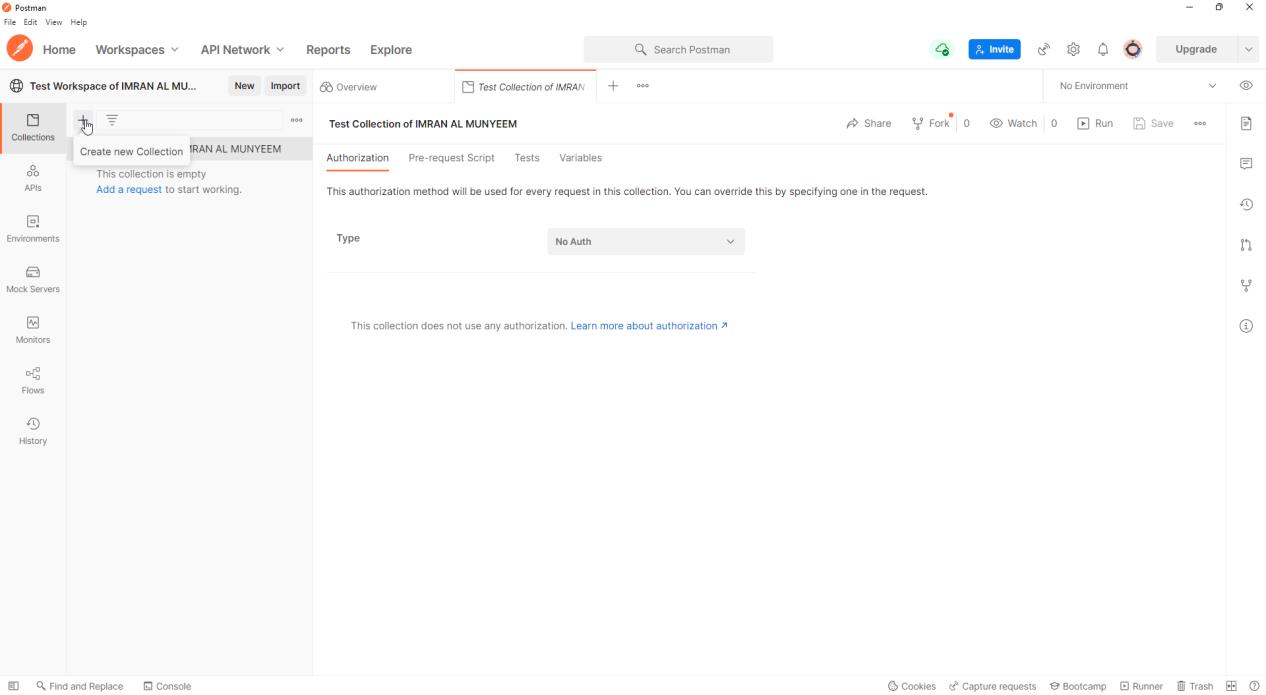
Create a Collection
A collection groups your API requests together so they can be organised, shared, documented, and — most importantly — run as a single automated unit, both inside Postman and from the command line in your CI pipeline. Think of a collection not as a folder of bookmarks but as the test suite it will grow into.
Step 1 — Select your workspace from the list.
Step 2 — Click on the Create Collection button.
Step 3 — Give the collection a name and press Enter.
Add a Request
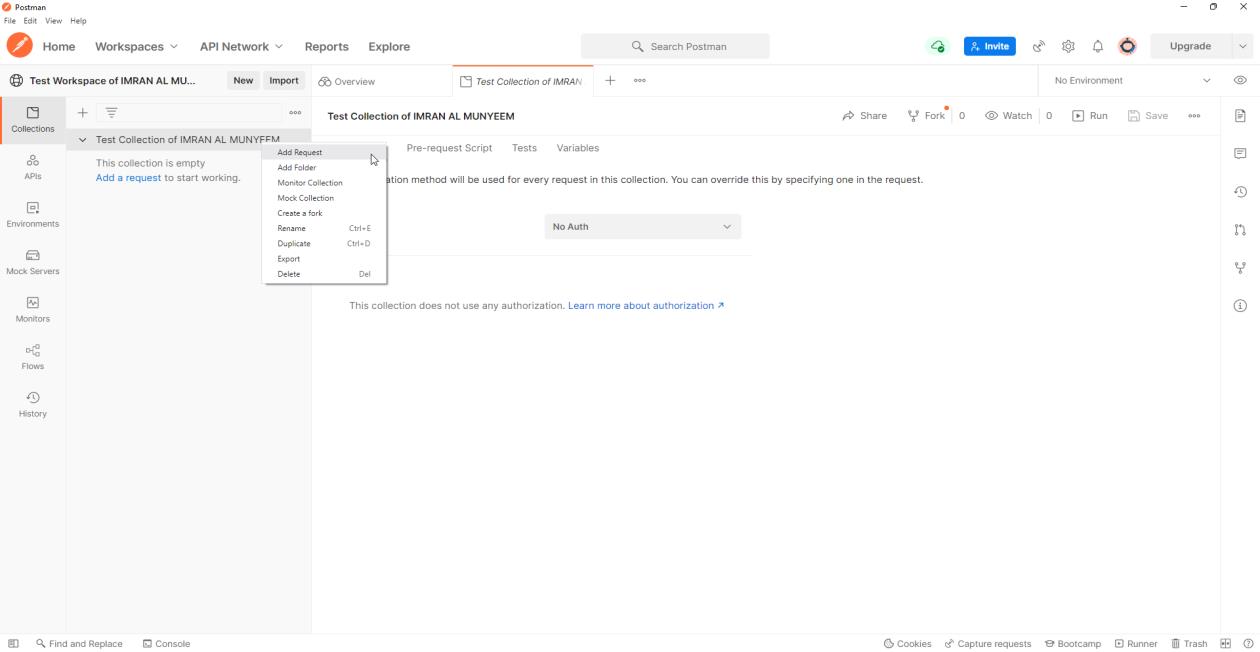
Step 1 — Click on the Add a request link, or right-click on the collection, or click on Add request.
Step 2 — Give the request a name.
Organising a Collection That Scales
The difference between a demo collection and a professional one is structure, and structure is cheapest to add on day one:
- Folders mirror the API. One folder per resource or feature —
Users,Orders,Auth— with requests inside. Folder-level scripts (Chapter 7) then apply shared setup to exactly the right group. - Names describe behaviour, not URLs. "Login — wrong password returns 401" is a test report line;
POST /api/v1/loginis a puzzle. Six months from now, a collection run report full of behavioural names reads like documentation. - Descriptions everywhere. The collection, each folder, and each request accept Markdown descriptions. Postman generates publishable documentation from them automatically, and Postbot can draft them for you — but even one sentence per request pays for itself the first time a new teammate opens the workspace.
- Save examples. After a request returns a good response, save it as an example on the request. Examples power Postman's mock servers (Chapter 11) and show consumers what to expect without their having to call anything.
Pitfall: resist the "one giant collection" temptation. When a collection mixes exploratory scratch requests with the regression suite, CI runs become slow and flaky. Keep a personal scratch collection for exploration and a disciplined, folder-structured collection for the automated suite.